The first thing I know is that it’s impossible to resist a ribald pun. Even my normally clean-minded wife couldn’t help a snigger when she asked if I was screwing around in the workshop on my own this evening.
I had some brass, slot-head screws delivered to work today. A colleague looked at them lying on my desk and wondered aloud how you avoid destroying the heads. So I started to tell him. Half way through his eyes glazed over and he wandered off.
So for all those who know next to nothing about screwing but actually care:
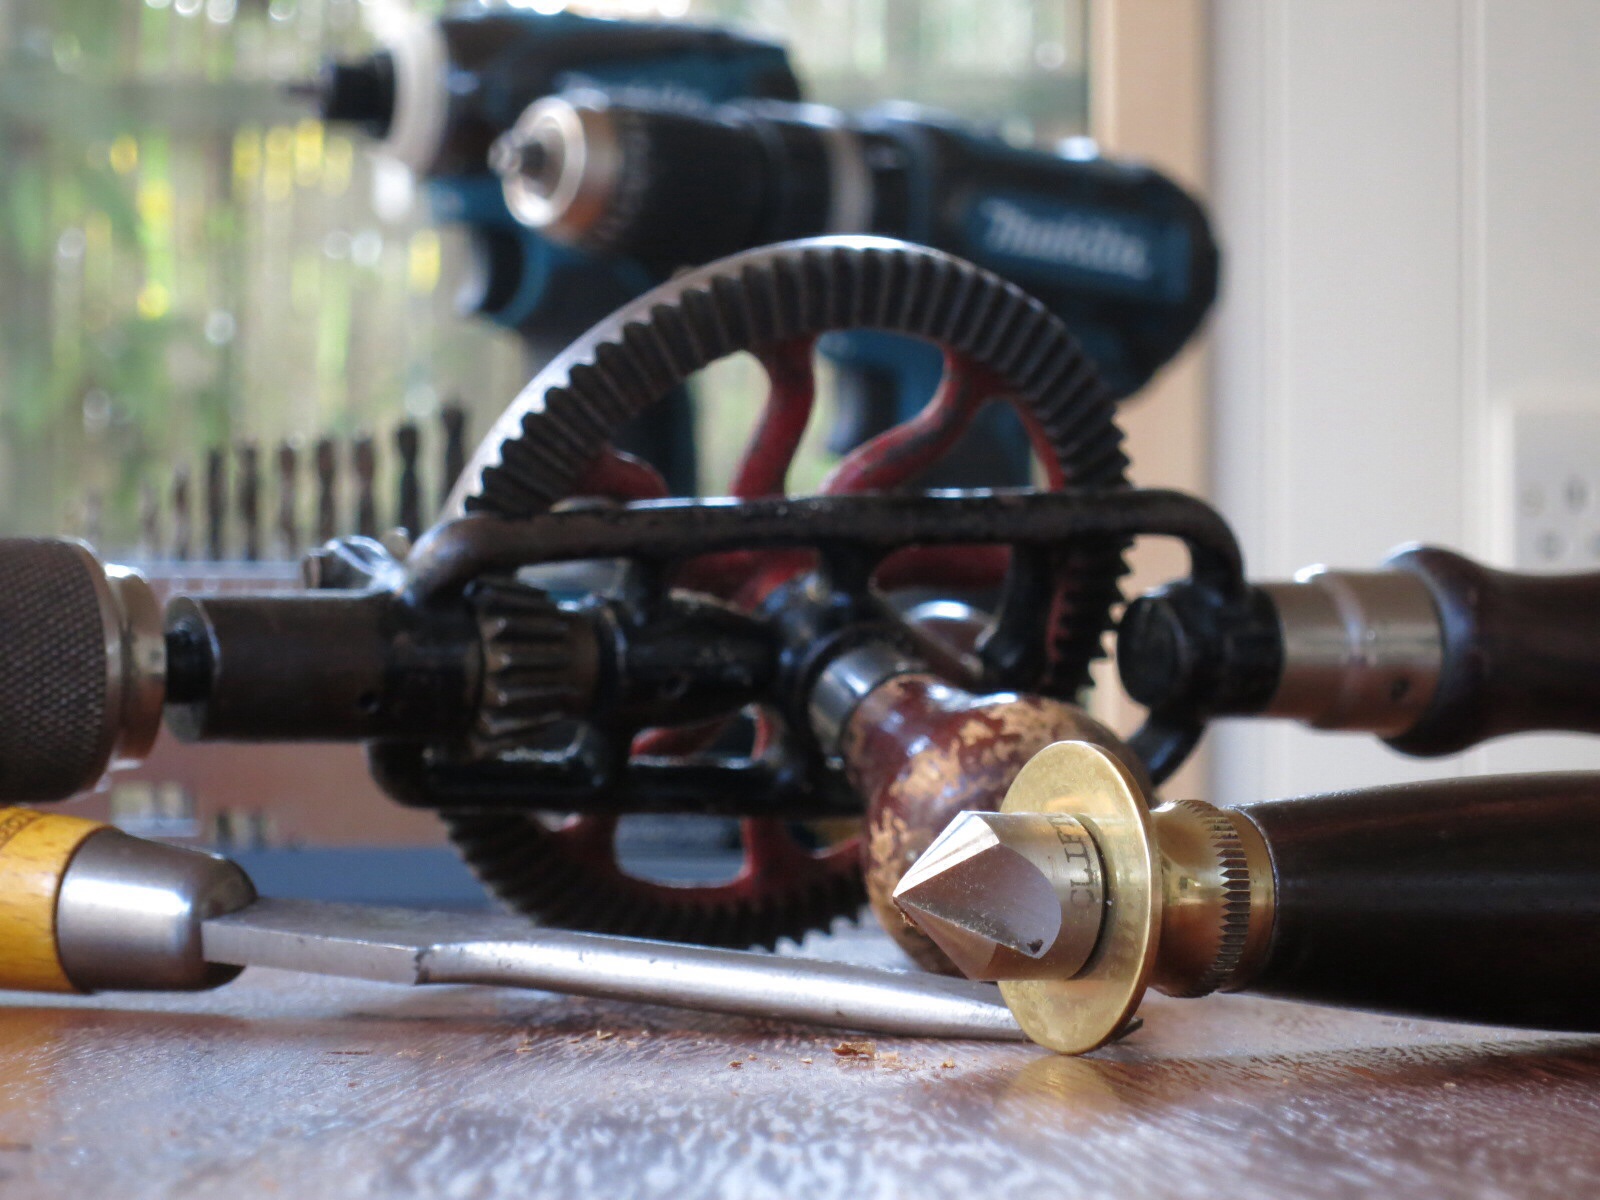
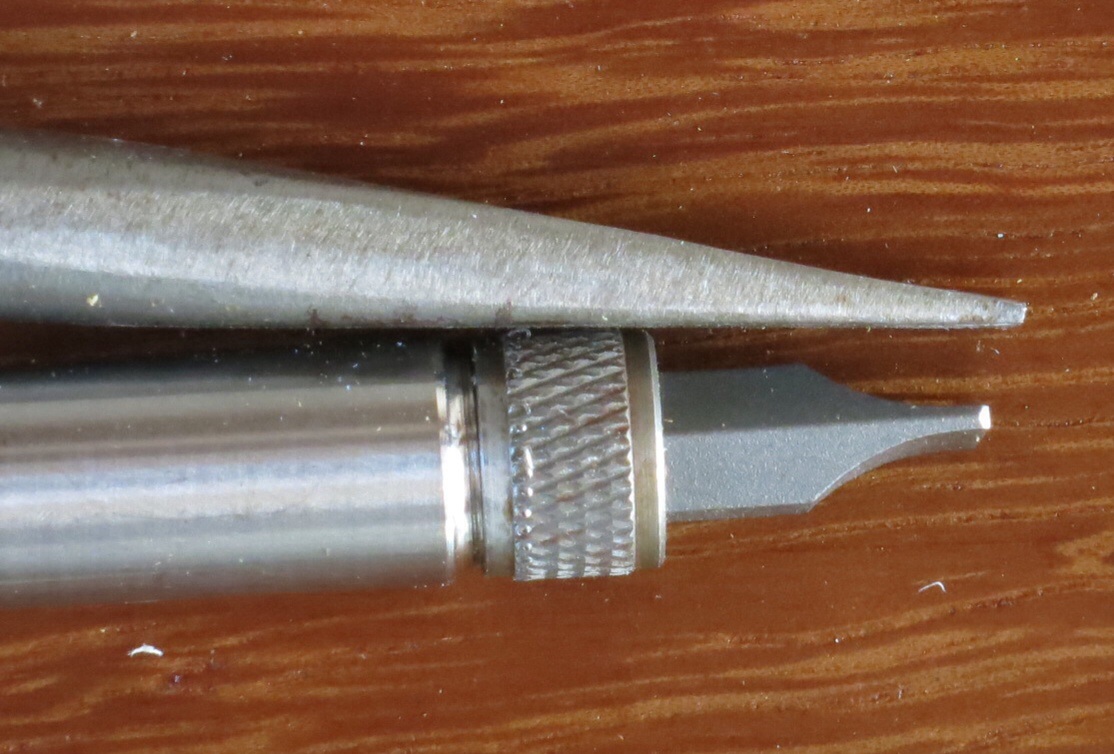
1. Use a screwdriver that fits. I have a lot of screwdrivers and often pick up cheap old ones when I find them. Each different size of screw head needs a different driver. The tip of the screwdriver should fit so well that it will hold the screw without support. Because most screwdrivers are manufactured to fit a range of screws they don’t work for any particularly well. Grind each screwdriver tip to the size of the slot.
2. Use a screwdriver with a tip with parallel sides. The one at the bottom is manufactured properly. The one at the top is going to get ground to get rid of the taper in the tip. It will end up with a tip that has concave sides. The end will be very close to parallel. Because most of my tools are still in packing boxes this new addition has escaped the grinder for the time being. But its days of tapered mediocrity are numbered.

3. Use a tapered drill for the pilot hole. To be fair I rarely do this. I only have a couple of tapered drill bits and am too mean to buy bits I’m going to use once in a blue moon. However if you want to ensure that your timber doesn’t split under the wedging action of a screw a tapered bit means that the taper in the screw is accommodated. However I always…
4. Use the right sized bit for the pilot hole and drill it full depth. Classic Marine has a useful chart. What do you mean you don’t have a 7/64″ bit?
5. Drill a clearance hole if you want to draw two pieces together. If you think for a moment about the way a screw works it’s obvious that if it goes though a pilot hole in one piece and into a pilot hole in another no matter how hard you drive the screw if will not draw the pieces together if the threads are properly engaged in the upper piece. But if the threads of the screw slide though the clearance hole and catch in the pilot hole of the lower piece then as the head draws up to the upper piece it will pull the two together.
5. Clamp pieces together. If there’s a gap when you screw two pieces together there will always be a gap. If you clamp them tight, drill your pilot hole and then screw them together they’ll remain tight.
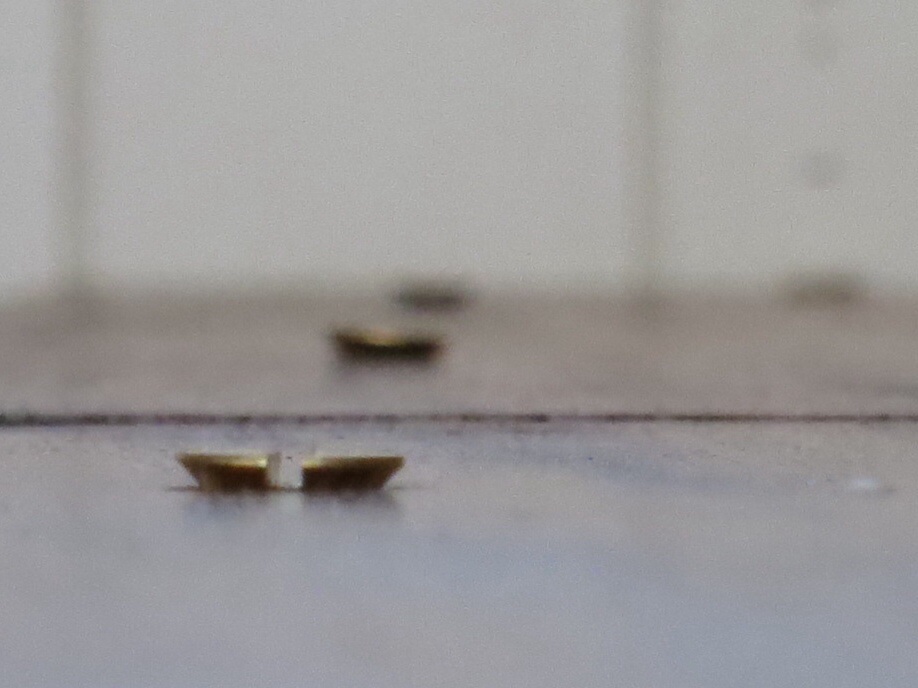
6. When using brass screws use a steel screw first. I’ve lost count of the number of heads I’ve wrung off brass screws. However drilling the right size pilot hole and then cutting threads in the wood with a steel screw reduces the load needed on the brass screw. I wish I did this more.
7. Wax the threads. This is such an easy thing to do and makes so much difference.

I have a small pot of softer wax made from beeswax and turpentine somewhere but it’s hiding in a box so I used candle wax this evening. I’m convinced the softer wax sticks to the screw better and so the effect lasts longer but I may be kidding myself. Certainly the difference between no wax and wax is immeasurably greater than different types of wax.
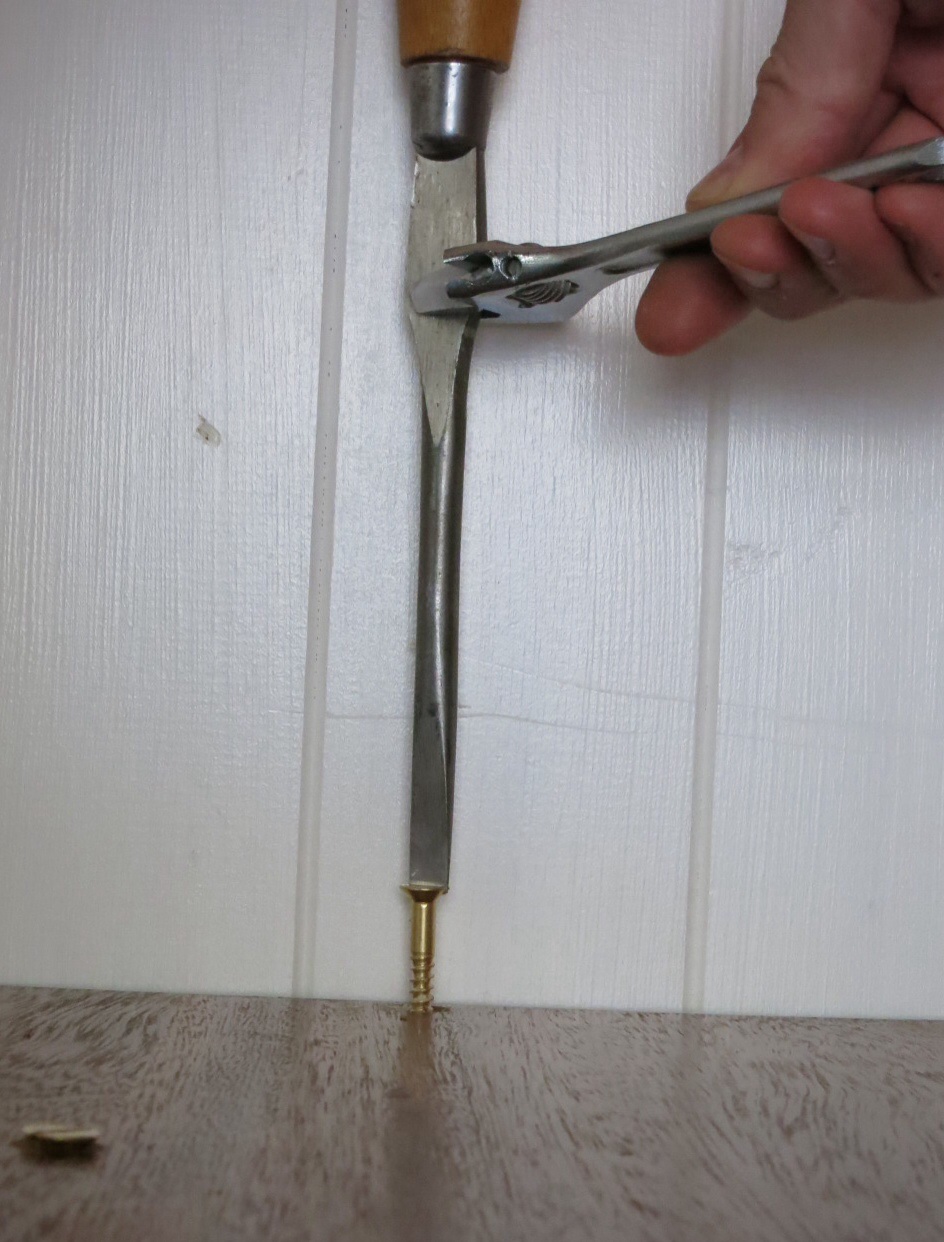
8. In corners use a “turn screw”. Which is just an old word for a screwdriver with a flat on the shaft. You can put pressure on the top of the handle and turn the driver with an adjustable spanner. You actually need surprisingly little downward pressure. This means that even in an awkward position you can keep the screwdriver vertical and the tip fully engaged, reducing the chance of it breaking free and damaging the head.

9. Tighten them up evenly. Your work can shift when screwing it down. To avoid this tighten the screws most of the way. Make sure everything is still where you want it and then tighten them all down bit by bit. If you tighten one in one corner of the workpiece it can spring the opposite corner up in the air making life rather difficult.

10. Clocking screws is a fool’s errand. You can adjust the countersink hole. But this puts the screws at different heights. You can over tighten some or leave others loose. But this is just self-defeating. Or you can go to the frankly absurd lengths of putting each screw in your drill press and sanding a fraction off the back of the head, then putting the screw back in the hole to see if it now fits and is “timed” with all the others. Or you could just demonstrate your superior craftsmanship and understanding by correctly tightening each one and then leaving the blessed things alone.
11. A brace with a screwdriver bit is very handy. Use your 6″ brace. The 14″ is asking for trouble. It’s even more important that the bit fits the screw because you’re going to be putting a devil of a lot of torque on it and it’ll skate off without hesitation.
12. If you’re drilling a pilot hole in exterior timber dribble wood preservative in the hole first. My father-in-law will even go the lengths of setting up a tiny funnel into the hole and filling it with preservative and hardener. This then acts as a reservoir to keep feeding the wood as it soaks up the preservative.
13. In soft wood drill the pilot hole over size and then pour in thinned epoxy. Wax the screw very thoroughly and when the epoxy is green (not completely cured and still fairly soft) drive in the screw. If you ever want to get the screw out heat the head to soften the epoxy with a soldering iron. I have a gas powered one for cutting rope and it works a treat.
Attributions: I have learnt all of this from other people: my father (who got it from his toolmaker father and his cabinet maker grandfather), my father-in-law, from the online and published works of Chris Schwarz, Bob Smalser, Tim Roussau and Greg Rossel. I use all these techniques and am happy with them, if you’ve got others or improvements let me know. As I remember, learn about and use other techniques I update this page.
St.John